ComfyUI-easygoing-nodes! Improved SDXL Prompt Parsing Prototype and Color Correction

- Prototype improvements for CLIP-G processing
- CPU processing for HiDream’s text encoder
- LAB color space correction node
Introduction
Hello, I'm Easygoing!
This time, I'm excited to introduce ComfyUI-easygoing-nodes, a custom node package for ComfyUI. Here's an overview of what it offers.
Core Feature: Improved SDXL Prompt Parsing Prototype
ComfyUI-easygoing-nodes includes three main functionalities:
- Improved prototype for SDXL prompt parsing
- Processing HiDream's text encoder on the CPU
- Color correction and other custom nodes
Let’s dive into each one.

CLIP-L and CLIP-G
SDXL incorporates two types of text encoders:
- CLIP-L (lightweight, excels at short text)
- CLIP-G (high-performance, handles longer text)
CLIP-L and CLIP-G process prompts independently. For example, with the input prompt:
Input Prompt
cat, cute, sleeping
CLIP-L Parsing (Representation)
cat, cute, sleeping <|end of text|>
CLIP-G Parsing (Representation)
cat, cute, sleeping<|padding|><|padding|><|padding|><|padding|><|padding|><|padding|><|padding|><|padding|><|padding|><|padding|><|padding|><|padding|><|padding|><|padding|><|padding|><|padding|><|padding|><|padding|><|padding|><|padding|><|padding|><|padding|><|padding|><|padding|><|padding|><|padding|><|padding|><|padding|><|padding|><|padding|><|padding|><|padding|><|padding|><|padding|><|padding|><|padding|><|padding|><|padding|><|padding|><|padding|><|padding|><|padding|><|padding|><|padding|><|padding|><|padding|><|padding|><|padding|><|padding|><|padding|><|padding|><|padding|><|padding|><|padding|><|padding|><|padding|><|padding|><|padding|><|padding|><|padding|><|padding|><|padding|><|padding|><|padding|><|padding|><|padding|><|padding|><|padding|><|padding|>
CLIP-L is designed for short prompts and uses a clear end of text. In contrast, CLIP-G, built for longer prompts, fills unused space with padding tokens instead of an end tag.
This is a correct implementation based on CLIP-G and SDXL specifications, so there’s no issue with it.
However, for short prompts (especially negative prompts for anime models with tag-based inputs), the abundance of <|padding|> tokens can dilute attention from meaningful words.
Simplifying CLIP-G Parsing
To address this, I applied CLIP-L’s straightforward parsing approach to CLIP-G. Specifically, I replaced the ComfyUI/comfy/sdxl_clip.py file with a modified version provided by shiba*2.
Since Stable Diffusion 3.5 and HiDream also rely on this sdxl_clip.py file for CLIP-G, this change affects those models as well.
Comparing Illustrations
Let’s see the difference in action!


Image Similarity: 99–99.5%

- Model: true_pencil-XL-v1.0.0
Image Comparison Tool
There are subtle differences between the images, and it’s hard to say which is better.
If you prefer the look of the prototype, it’s worth giving it a try.
The prototype sdxl_clip.py is automatically applied when loading ComfyUI-easygoing-nodes, so once the custom node is installed, no further setup is needed.
Processing HiDream’s Text Encoder on CPU
The second feature is an implementation that processes HiDream’s text encoder on the CPU.

Recent updates to ComfyUI caused an issue where specifying device: cpu for HiDream’s text encoder wasn’t properly recognized, resulting in all processing defaulting to the GPU.
To fix this, I modified ComfyUI/comfy/text_encoder/hidream.py to ensure all HiDream text encoder processing occurs on the CPU.
Depending on your setup, running HiDream’s text encoder on the CPU can approximately double processing speed.
Like sdxl_clip.py, this modified hidream.py is automatically applied when loading ComfyUI-easygoing-nodes.
Additional Custom Nodes
Now, let’s explore the custom nodes added in ComfyUI-easygoing-nodes.
Color Correction in LAB Color Space
HDR Effects with LAB Adjust

The HDR Effects with LAB Adjust node is a custom node that performs color correction in the LAB color space.
While PNG images in image generation are typically processed in the RGB color space, this node converts them to LAB color space for brightness and color adjustments.
RGB Color Space
In RGB color space, colors are expressed by combining Red, Green, and Blue.
Brightness is determined by the sum of RGB values, meaning that changing color affects brightness and changing brightness affects color.
LAB Color Space
In contrast, LAB color space separates lightness and color into distinct channels, allowing independent adjustments without mutual interference.
Parameter Definitions
The HDR Effects with LAB Adjust node includes the following settings:
Brightness Adjustments
- hdr_intensity: Strength of brightness adjustment
- shadow_intensity: Darkens shadow areas
- highlight_intensity: Brightens highlight areas
- gamma_intensity: Darkens the overall image
Color Adjustments
- ab_strength: Strength of color adjustment
- a_adjustment: Adjusts green ↔ red balance
- b_adjustment: Adjusts blue ↔ yellow balance
Final Touches
- contrast: Adjusts contrast
- enhance_color: Adjusts saturation (color intensity)

By default, the HDR Effects with LAB Adjust node:
- Emphasizes dark areas to increase contrast
- Adds a slight red tint targeting skin tones
- Reduces the yellowish tint common in AI-generated images
Comparing Illustrations
Let’s compare the results:
The HDR Effects with LAB Adjust node is effective on its own, but combining it with ComfyUI-SuperBeasts’ AI Auto Color Correction often yields even better results. I recommend using them together.
Original

AI Auto Color Correction (Super POP)

HDR Correction (HDR Effects with LAB Adjust)

Workflow
Here’s the workflow used for this color correction:

Other Custom Nodes
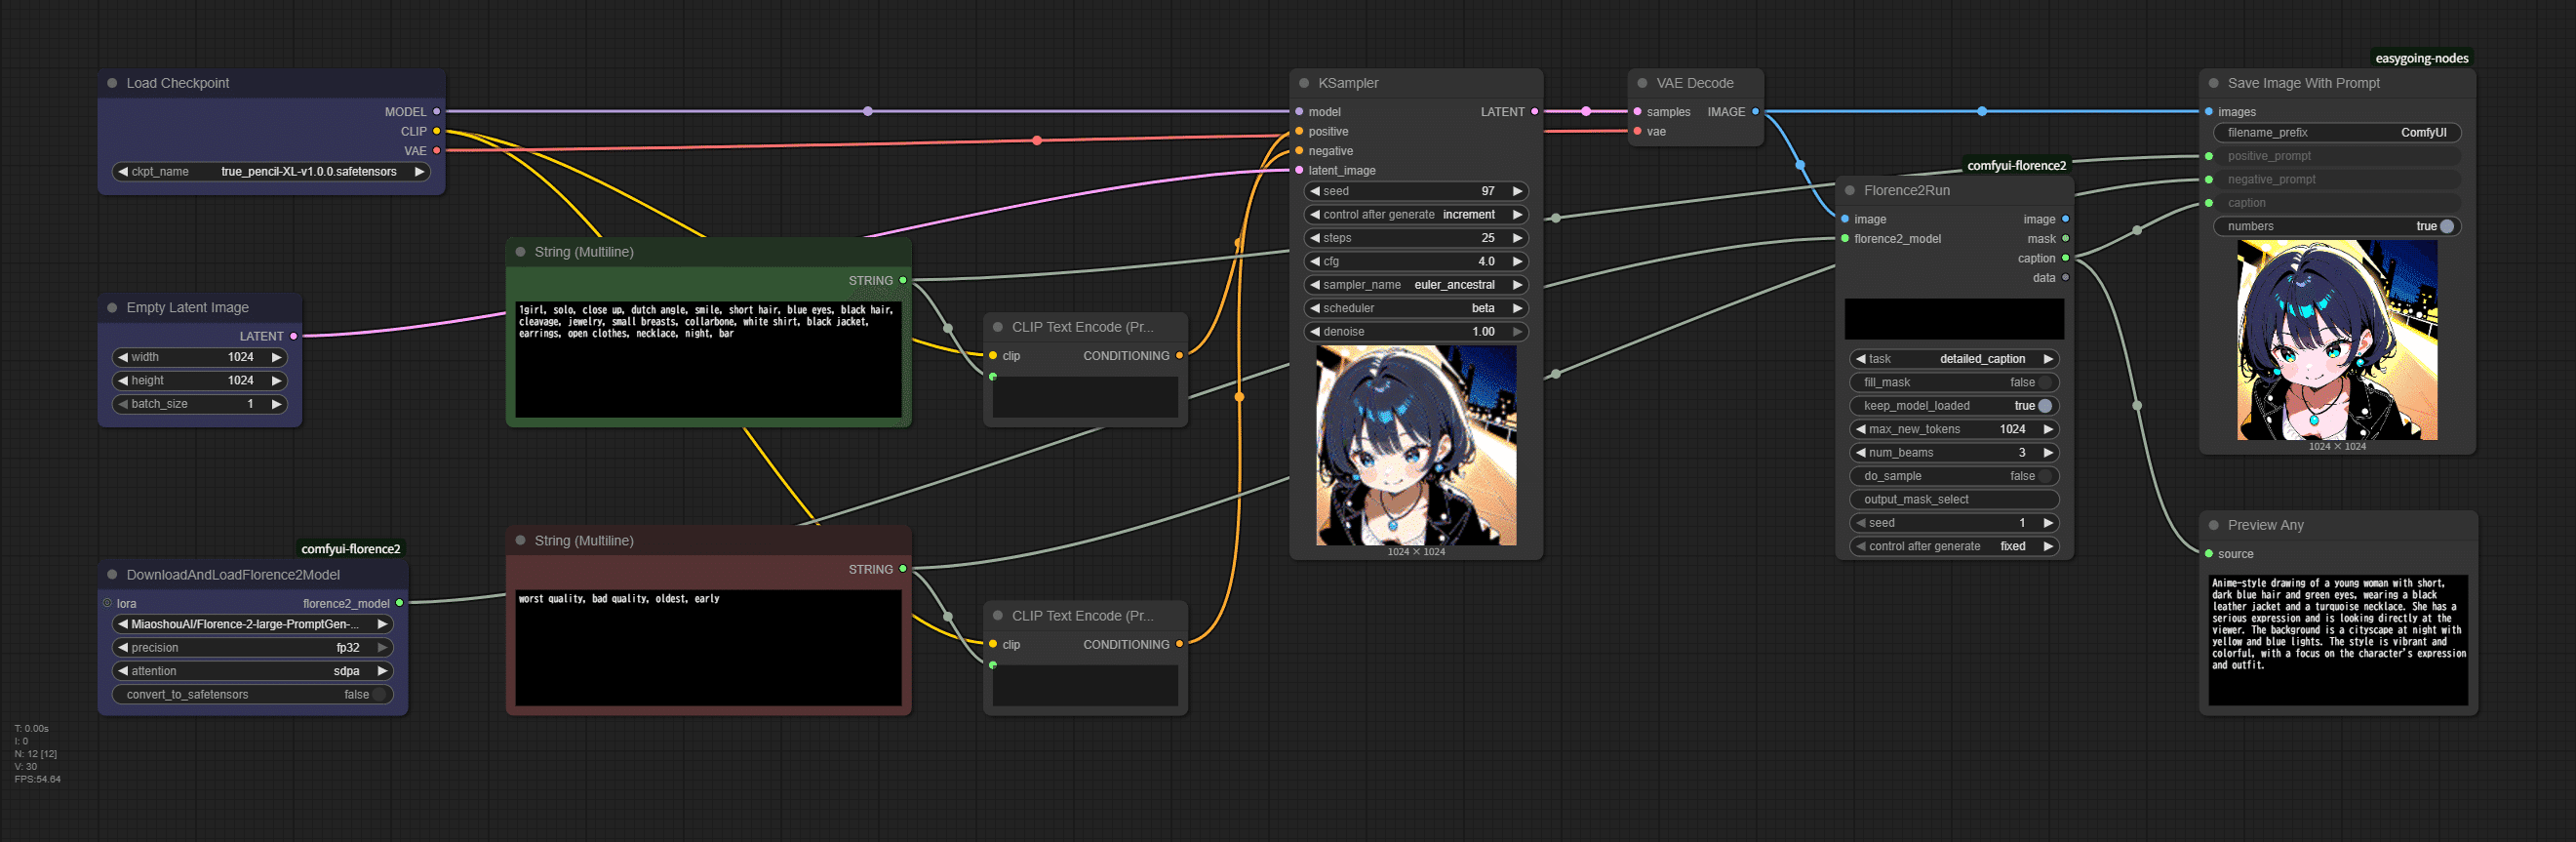
Save Image With Prompt

- filename_prefix: File name
- positive_prompt
- negative_prompt
- caption: Image caption
- numbers: Include sequential numbers at the end of the file name
The Save Image With Prompt node saves PNG images with metadata for positive_prompt, negative_prompt, and caption.
The caption metadata is designed for cases where captions are automatically generated using models like CLIP-Vision or Florence-2.
Setting numbers to False omits sequential numbering, unlike the default True behavior.
Sample Workflow

- Workflow: true_pencil-XL-v1.0.0_20250914.json
- Model: true_pencil-XL-v1.0.0
Reference: Display in XnView MP (image management and editing software)

With an app that can read metadata, you can view prompts and captions without opening ComfyUI.
Loading Prompts with D2 Load Image
Thanks to da2ei-ai, who develops D2-nodes-ComfyUI, the D2 Load Image node now supports loading positive_prompt and negative_prompt saved using the Save Image With Prompt node.

D2-node-ComfyUI includes a variety of custom nodes designed to make workflows clearer and more convenient, so I encourage everyone to give it a try!
Introduction to the D2 Regex Replace Node
Installing ComfyUI-easygoing-nodes
Here’s how to install ComfyUI-easygoing-nodes, which follows the standard process for custom nodes.
Using ComfyUI-Manager (Recommended)

Search for “easygoing” in ComfyUI-Manager, and Easygoing Nodes will appear in the list.
Manual Installation
For manual installation, run the following command in the custom_nodes folder:
git clone https://github.com/easygoing0114/ComfyUI-easygoing-nodes.git
Verifying ComfyUI-easygoing-nodes Loading
When ComfyUI starts, a successful load of ComfyUI-easygoing-nodes will display the following log:
EasygoingNodes settings loaded: {'enable_sdxl_clip': True}
✓ Applied module replacements: sdxl_clip
Module replacement process completed!
This log confirms that the CLIP-G prototype and HiDream text encoder processing are functioning correctly.
Conclusion: Try ComfyUI-easygoing-nodes!
- Prototype improvements for CLIP-G processing
- CPU processing for HiDream’s text encoder
- LAB color space correction node
This was my first time creating custom nodes for ComfyUI, and I was amazed by its flexible implementation.
Not only can you create original nodes, but you can also replace ComfyUI’s core files with modified versions without altering the originals, allowing for safe customization.

I’d like to extend my gratitude to Shiba*2 and SuperBeastsAI for generously providing code for this project.
Thank you for reading!
Update History
2025.1.9
- Removed Load Clip (set device) nodes following ComfyUI updates.